Simplepush Blog
Actionable Push Notifications for Node-RED
An actionable notification is a push notification with one or more action buttons.
Selecting an action button usually has an immediate action associated with it.
When sending an actionable notification from the Simplepush Node-RED node, the immediate result of selecting an action is that the node will forward the action name to its msg.payload output.
This creates the potential to execute different subflows based on which action was selected by the user.
In this article you will learn how to send actionable notifications from the Simplepush Node-RED node and continue different subflows based on which action was selected.
Installation
Run the following command in your Node-RED user directory. Typically your Node-RED user directory is ~/.node-red.
npm install node-red-contrib-simplepush
Install Simplepush on your Android or iOS device. After you launch the app for the first time your personal key is presented to you. You will need this key in order to receive actionable notifications.
Sending an Actionable Notification
Sending an actionable notification to Simplepush is easy.
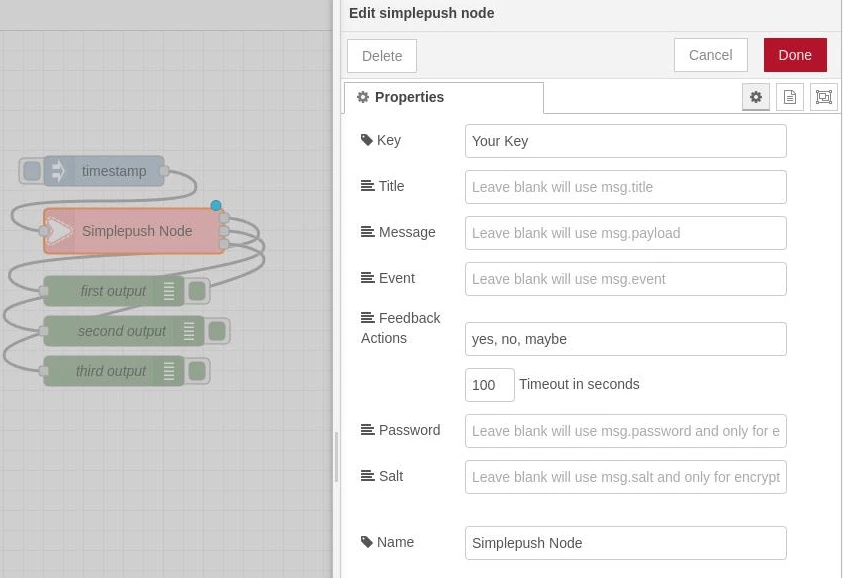
All you have to do is to provide your key, a message and the actions that you want to display.
If you want to learn how to send actionable notifications without Node-RED, please read this article.
Creating the Flow
For our example flow we use an inject node, which on default forwards the current timestamp, and feed it into a Simplepush node.
The Simplepush node is responsible for sending (actionable) push notifications. When an action is selected from within the Simplepush app or the notification center of an Android or iOS device, the Simplepush node will forward the selected action information to the correct output.
Adding actions will add an output for every action on the Simplepush node.
These outputs are named after the corresponding actions and will be triggered when the corresponding action is selected.
Defining actions by passing them to the Simplepush node via msg.actions will result in just one output that will be triggered for all selected actions.
The timeout duration says how long Node-RED should listen for the selection of an action. You can choose this duration as you like but be aware that currently there is a limit of 30 days after which action information in the backend gets deleted.
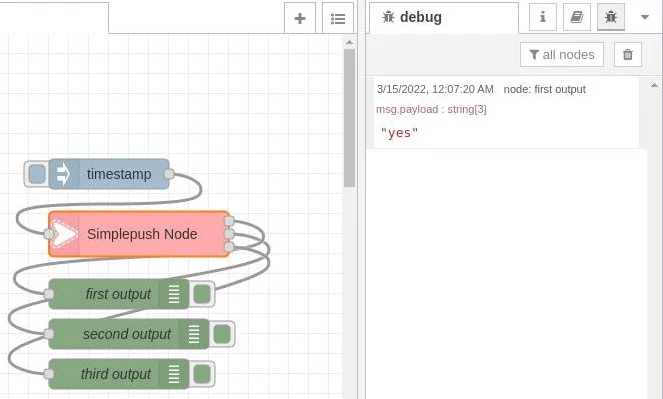
In order to show that the action information is forwarded correctly, we connect debug nodes to the outputs of the Simplepush node.
If you don’t want to create the example flow manually, you can import it from the following JSON:
[{"id":"f0c1e703970d918b","type":"tab","label":"Flow 1","disabled":false,"info":""},{"id":"c24a42e06dd4fb17","type":"inject","z":"f0c1e703970d918b","name":"","props":[{"p":"payload"}],"repeat":"","crontab":"","once":false,"onceDelay":0.1,"topic":"","payloadType":"date","x":680,"y":140,"wires":[["5f7bad0bb1763fe2"]]},{"id":"5f7bad0bb1763fe2","type":"simplepush","z":"f0c1e703970d918b","key":"Your Key","title":"","message":"","event":"","actions":"yes, no, maybe","actionTimeout":"100","password":"","salt":"","name":"Simplepush Node","outputs":3,"x":710,"y":200,"wires":[["282d690a61b1b815"],["2ba8de7a61540c83"],["0b2bec3f9779b137"]]},{"id":"2ba8de7a61540c83","type":"debug","z":"f0c1e703970d918b","name":"second output","active":true,"tosidebar":true,"console":false,"tostatus":false,"complete":"payload","targetType":"msg","statusVal":"","statusType":"auto","x":700,"y":300,"wires":[]},{"id":"282d690a61b1b815","type":"debug","z":"f0c1e703970d918b","name":"first output","active":true,"tosidebar":true,"console":false,"tostatus":false,"complete":"payload","targetType":"msg","statusVal":"","statusType":"auto","x":690,"y":260,"wires":[]},{"id":"0b2bec3f9779b137","type":"debug","z":"f0c1e703970d918b","name":"third output","active":true,"tosidebar":true,"console":false,"tostatus":false,"complete":"payload","targetType":"msg","statusVal":"","statusType":"auto","x":690,"y":340,"wires":[]}]
Running the Flow
Clicking the input button of the inject node will result in an actionable push notification being sent to the defined key.
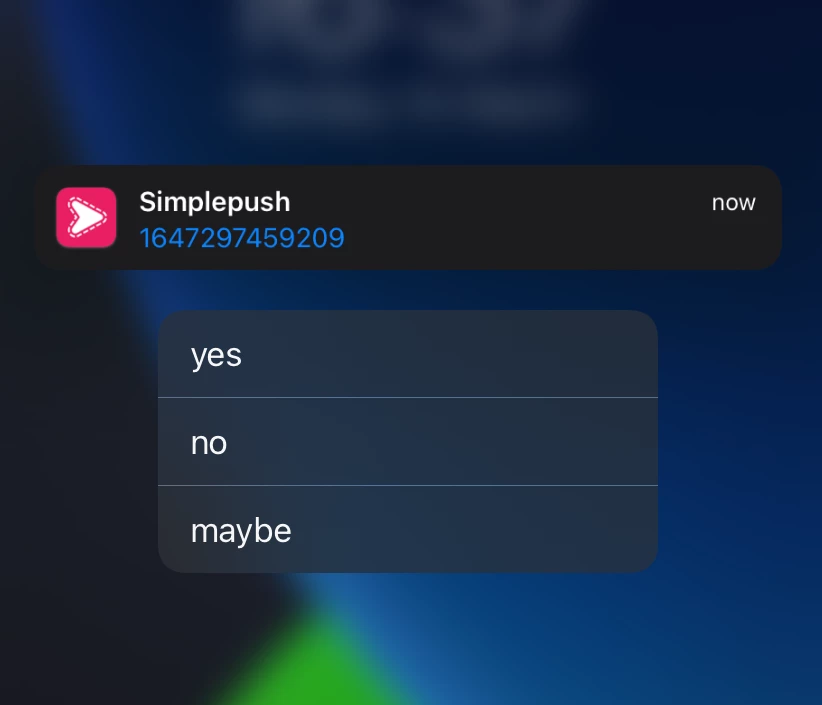
If you now select one of the three actions, you can observe that the corresponding debug node will output the name of the selected action.
Here we selected “yes” which resulted in “yes” being printed to the debugger connected to the first output of the Simplepush node.